Pages

Showing posts with label DIY. Show all posts

Monday, January 25, 2016

DIY Ache Rub with Essential Oils

    99% of Americans complain of discomfort...the other 1% cannot speak or ..something. Discomfort is something we ALL will deal with at some point in our lives. So it comes as no surprise that one of my favorite DIY recipes is for a ache rub. I have given away tons of this lovely salve because of how amazing it works. The recipe here will make about 5 ounces. I bought small 1oz containers (Here) because a little works very well and it works so well that you will want to share it with others. My biggest issue with sharing is that it takes quite a bit of essential oils to make, so I also made smaller containers that I bought (Here) and printed a recipe on a pretty piece of paper. I gave the bigger ones to close friends and family and the smaller ones, I was able to sample out for those I did not know or weren't that close to. My biggest goal for my wellness advocates is to thrive in a self sustaining business. So, unless you have a ton of money or you're making gifts - keep your samples smaller so you're not breaking your bank. We want to share the joy of these oils with others, but we cannot put ourselves into poverty doing so. They will understand, I promise! So, here is my favorite recipe for ache relief rub...make, use, enjoy!


You will need:
Makes about 5oz

You can get your essential oils by clicking Here.

3oz Coconut Oil (You can get this at most grocery stores and pretty much all health food stores)
1oz Cocoa Butter (I get mine: Here)
1oz Beeswax (I get mine: Here)

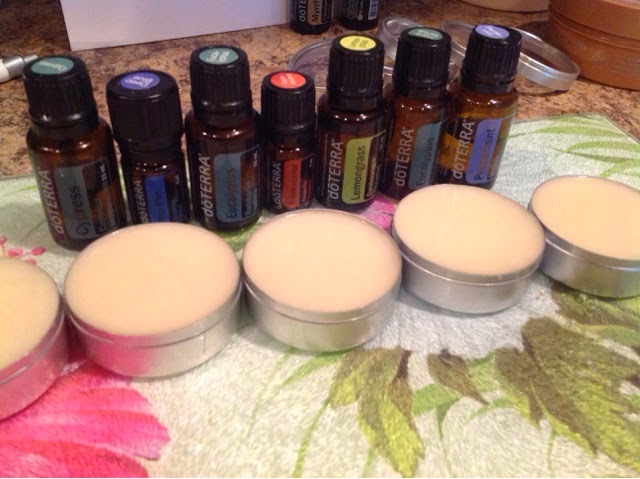
This is the base...now add any combination of oils you wish!
I like to choose some from each category so that it works for a lot of different things. I also found that I needed to add more peppermint but others say less is OK for them. The point is, please customize to what best fits YOUR needs.

Recommended Oils: Choose ONE from each category:


At least 30 drops of ONE oil to help with ache relieving:

-For bone pain - Soothing Blend or Cypress
-For joint pain- Wintergreen or Roman Chamomile
-For muscle ache- White fir or Clove

 At least 10 drops of ONE oil to help with tension relief:

-For shoulder, neck and back tension- Marjoram, lavender, Helichrysum or Massage Blend
-For a muscle tear - Marjoram
-For muscle spasms- Basil or marjoram
-for ligament pain- Lemongrass
 
At least 10 drops of an anti-inflammatory: 

-Eucalyptus, Frankincense, Melaleuca, Myrrh are all great for their anti-inflammatory properties

At least 10 drops of an oil to help support circulation:


-Cypress, Rosemary, Thyme and Massage Blend are all great for increasing circulation

 and- 

10 Drops of Peppermint- Peppermint is important to the recipe and it's recommended not to be omitted. Peppermint is considered a "driving" oil and helps "drive" all of the oils into your body

Directions: This is the easy part! 
   Combine coconut butter, cocoa butter and beeswax in a small glass bowl and put in a sauce pan with 2 inches of water (double broiler method). I recommend NOT using a true double broiler because the oil and butter is very hard to clean off the pans...so I recommend ONLY using glass. You can also melt this into a mason jar and omit the metal tins completely. Melt and mix in the Mason jar and just store in the same jar.
   After the ingredients are mixed and melted completely, pull off of the heat and let sit on the counter for several minutes - up to 45 minutes. You want the mixture to cool to the point where it just begins to harden and isn't so hot anymore. Essential oils do not thrive in heat, and the very hot mixture will compromise some of the therapeutic benefits of your oils.
    When the mixture is at desired temperature - mix in your oils. No particular order, and then mix well. Then allow the mixture to cool all the way...I put my mixture in the refrigerator so that it hardens quicker. And...Viola! Done! It's simple, effective and absolutely amazing! 

        My favorite combination and the one I use all the time now is Soothing Blend, Lemongrass, Cypress, Peppermint, Marjoram and Frankincense. I can apply to my very flared up sciatic nerve and literately within seconds - I can walk without pain. It works for several hours and you only need a wee little bit for it to work. Rub it in, and if you wish apply a warm compress to help the oils soak deep into the muscles.

    Let me know how you like this ache rub! If you have any questions, please feel free to email me at beavanhook@gmail.com - I would be happy to help you in any way that I can!Want the ache rub without all the mixing and making of it? Visit my website at www.inspiredbylife.bigcartel.com and purchase it there!

With a warm heart and oily hands-
Bea

Sunday, January 24, 2016

3 Ingredient Tuna Training Bites

We just adopted two rescue puppies! Yay! What now? Of course, we need to train them. In 2 days we went through a pack and a half of training treats..my frugal mind is thinking there has to be a homemade version of these things...and there is. I love knowing what they're eating too, with all the recalls over the years. This 3 ingredient training bite is easy enough for any novice baker but yummy enough for the most advanced baker's pup to enjoy. Tuna, Egg, Flour - that's all!

You will need:
1 Can of Tuna (oil)
1 Egg
3/4* cup of flour (could be less depending on how oily your tuna is)

Preheat your oven to 400 F

Step 1) The tuna will be big coming out the can, so you want to mince it up a little bit. I have found that some even blend theirs, but I didn't want to use the extra dishes.

Step 2) Beat the egg in a separate bowl and then add to the tuna

Step 3) Gradually add the flour - keep adding up to 3/4 cup of flour until your mixture is at mashed potato consistency

Step 4) Spread mixture out in a cake pan and bake at 400F for 10-12 minutes depending on how hard or soft you'd like your treats. My puppies are chewers so I did 12 minutes to make it a little stiffer for them. This is not a crunchy treat though. 

Step 5) Pull from the oven and cool completely. Cut to desired size and...done!! Easy as that!

One of my favorite things about making training bites at home is the ability to make them whatever size I want. For now, we are rewarding for many things and they are small so a smaller bite is preferred. Later, they will need less rewarding but will be bigger so I can make the bites a little bigger. You can even make these small enough for your feline friends...our kitties love them too! They're very easy to just break apart. Our puppies will do ANYTHING for these treats!

**Since there is oil in these bites, it is recommended that they be stored in the refrigerator or in a cool place so they will last longer.

***If you would like to use tuna with water since it is much cheaper, just add a heaping tablespoon of coconut oil in your mixture. Coconut oil is great for furbabies coat as well!!! 

These will last:
Refrigerator - 3 weeks
Room air - 7 days
In my home, with my puppies - 1 day

One of the things I love to do while these are baking is washing up the dishes I used. This helps keep the kitchen tidy! 

Wednesday, March 18, 2015

Update on Life

  Every time I think I have a day to write, I end up not having the time. Then I read an article yesterday for this internship program I am doing and it said..You make time for things that are important to you. Even though, I have very few readers..I really enjoy blogging. It is something that helps me have an outlet to the world past Facebook and what communication I get with people in person. It's nice. I realize that lately I have been posting recipes, and I felt that if I did not have time to make something up and then blog about it, then no one would be interested in reading. My most viewed blog posts are recipes....after all, what can I do for you. But this whole blogger thing isn't really for other people, is it? I mean, isn't it for me too? I love creating things both recipes and design. I love writing, I love business. The journey my life has taken me on is captured in my blog. Each year I look at old posts and chuckle, thinking how far I have come though..is truly humbling. My new radio show (www.kaplanradio.com) starts today. My first recording...awful! I am so nervous to actually hear it but it has to be a little better since its edited. I am not sure how long I will be doing the radio show...depends, I guess. The biggest thing is that in 6 weeks, I will have gotten my degree. This is a HUGE milestone in my life. I am so beyond excited to be done with college and have time to do other things. This week, over 30 hours dedicated to the internship and homework already. It's worth it, I just know it is.
   Even if no one is reading, I will start posting more updates on life. I love talking about business...so why don't I do that more? I want to increase the vibration I am putting off and start to heal my body and soul. Doing things that make you happy will do that, so you should do it too. Look forward to more from this small, cute blog and expect a sister blog soon.

Bea

Friday, March 7, 2014

DIY Laundry Soap

    I have always been intrigued with those who buff up and make their own laundry detergent. It seems like such a hard thing to do, but so simple. So simple looking that I knew surely I would screw it up. We stopped using cloth diapers a few months ago because the cost to wash them was getting expensive. So we started using Seventh Generation diapers, and put the cloth diapers in the drawer. When money gets tight, the mind gets desperate. My mind kept going back to he homemade laundry soap that's safe for cloth diapers recipe I seen on a Facebook group I am part of. (I'll put the link below). Anyways, long story short - I finally took the plunge, and I will never look back. I don't know why I insist on doing so but I alter just about every single recipe food or otherwise to tweak and make it my own. This recipe is easy, cheap and so so so much better for your clothes. Let me know what you think.

This recipe is so easy, and simple because I opted out of all the crazy recipes I've found and stuck with the classic, cheap and easy way to make laundry soap. I've been using this soap for about a month now and let me tell you..I like it BETTER than All and Tide. We have an HE machine and it always smells weird when washing clothes and I felt like I was constantly washing it, moreso than washing laundry even. This soap leaves no residue, no odor and even leaves the machine smelling fresh. Like springtime..seriously. 

You'll need :
2 bars of Fels naptha $1.98 
1 box Arm and Hammer washing soda $3.35
1 box Borax $2.99
1 cup Oxy Clean (optional)
25 drops Lavender essential oil (optional) 

You can find all this in the detergent isle at Walmart, target, or most grocery stores. You can find essential oils by contacting me, and I will get you settled with those.

I used a simple method of grate the laundry bar and just added everything else into a large tub and mixed as well as I could. I added in the essential oils by dropping over the top, never in the same spot twice and mixed it a bit. It took me 10 minutes max to make this soap and I have used about 1/4 of the tub in over a month for a family of 5. The cost savings are really obvious and the cleaning capabilities are so much better. Even with a business degree I cannot fathom why big box companies charge so much! Their profit margins must be huge! 

You'll need 1 heaping tablespoon per load...you read that correctly - ONE tablespoon per load. This stuff lasts months! How can you go wrong? You can't. 

Anyways, I really love this detergent for a few reasons...
1) It's affordable. Let's face it, who wants to spend a weeks pay on laundry every month?
2) It smells awesome! I love how it cleans my machine at the same time as it's cleaning my clothes
3) We don't have to buy a separate detergent for the baby. That'd right, this stuff is better than Dreft. We had always spent so much on making sure he had a different, mild soap but it turns out that all the harsh chemicals and perfumes in Dreft weren't making his skin issues much better. This soap..which hath no name other than soap, does not break him out and I am able to wash his clothes with ours. 
4) Did I already say that it was cheap? Or that it works amazing? Or that it's cheap?
5) I love how long it lasts, how little you need per load, and how well it cleans


Let me know how you like it! 

Until next time...
Bea